If you’ve been following my work as a container house supplier, you know I’m not the type to sell a “set it and forget it” product and move on. Last year, I worked with a client who’d bought a budget container house from a fly-by-night operation, and by month three, their kitchen ceiling was warping from hidden water seepage, their bedroom floor joists had started rusting, and they were stuck paying $12,000 in emergency repairs. That’s the kind of avoidable mess I built my business to help people steer clear of. Water is the number one enemy of container homes—forget the wind, forget the temperature swings, water will be the thing that ruins your space long before any other issue. The good news? Waterproofing a container house isn’t rocket science, but it does require specific, intentional steps, not just a random layer of sealant slapped on. Today, I’m breaking down exactly how we do it at our warehouse, and what you need to know to make your container home last 50+ years, not just 5. Container House
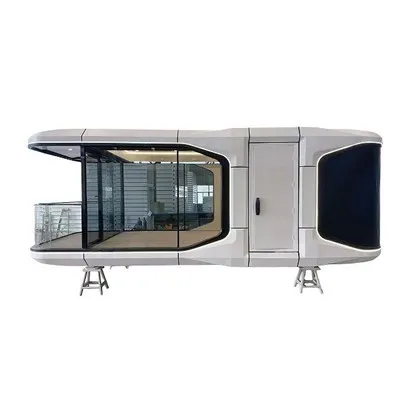
Let’s start with the basics: why shipping containers leak in the first place. A standard 20ft or 40ft steel shipping container is built to carry cargo across oceans, not to be a permanent home. Its walls are corrugated steel, designed to flex with heavy loads and extreme tides, which creates tiny, almost invisible gaps in the welds, around the door frames, along the roof edge, and where the side panels meet the base. Add to that the fact that most containers have a slight (and often unnoticeable) bow in their frame after being stacked for years, and you’ve got channels where water can pool, seep in, and turn into a problem. I’ve seen clients assume a cheap spray sealant from a hardware store would fix it, but that’s like putting a band-aid on a gunshot wound—it might stop minor leaks temporarily, but it won’t hold up to Arizona monsoons, Florida humidity, or Canadian freeze-thaw cycles.
First step in our waterproofing process: prepping the surface like our lives depend on it. You can’t just paint sealant over dirt, rust, or loose paint— it will peel right off, leaving gaps where water can sneak in. When a container arrives at our facility, the first thing our crew does is set it on a level concrete pad (we use laser levels to check, not just a spirit level) and let it sit for 48 hours. Why? Because shipping containers settle slightly when they’re moved, and we want to catch any small shifts before we start working. Next, we power-wash every surface—roof, walls, floor, door frames—with a pressure washer set to 3,000 PSI. For heavy rust spots on the steel, we use a wire wheel sander to grind away all the rust, down to the bare metal, then wipe the area with acetone to remove any oil, grease, or residual debris. I make sure our new hires spend at least a full shift on this step alone, because skimping on prep work is the number one mistake people make, and the mistake most fly-by-night companies cut to save time and money.
Once the surface is prepped, we move to the most critical area: the roof. This is where 80% of container house leaks start, hands down. Standard shipping container roofs are thin, flat (or slightly sloped, but not enough for heavy rain), and made of corrugated steel with exposed fasteners. Fastener holes are one of the biggest leak points—when a container is stacked, fasteners expand and contract with temperature, creating tiny gaps around the holes. Here’s what we do to fix that: first, we add a 1/4” layer of closed-cell foam insulation directly on top of the original roof. Closed-cell foam is critical because it doesn’t absorb water, unlike open-cell foam, and it also adds thermal resistance, cutting down on energy bills. Before we lay the foam, we cover every fastener hole and seam in the original roof with a butyl rubber sealant. Butyl rubber is the best for this job— it’s flexible, sticks to steel, and doesn’t crack even after years of temperature swings. We let the sealant cure for 24 hours before moving on. Then, we lay the foam panels, taping every seam with aluminum foil tape that’s rated for outdoor use and won’t degrade in UV light. Finally, we cover the foam with a rubberized asphalt membrane, which is a heavy-duty, flexible layer that acts as a second barrier. Some clients ask us to use a metal roof over the foam, but I always push back—metal roofs can shift, creating new gaps, and they conduct heat, which makes your container house hotter in summer. The rubberized membrane is lighter, more flexible, and creates a seamless barrier that won’t leak, even if the steel frame shifts slightly.
Next, we tackle the walls and weld seams. Corrugated steel walls have tiny gaps in the welds from the factory, and over time, those gaps can widen as the metal flexes. For the exterior walls, we use a high-quality acrylic latex sealant that’s formulated for steel, not wood or concrete. We don’t just spray it on— we use a brush to work it into every weld seam, every corner where two panels meet, and around any windows or doors we’re installing. We do two coats, letting each coat dry for 12 hours. Then, we add a layer of self-adhering waterproof membrane over the entire wall, cut to fit around windows and doors. Wait, I know what you’re thinking— that sounds expensive, and yes, it’s more costly than just sealant, but here’s the thing: most container houses will have insulation and drywall on the interior, so if a small leak does get through the exterior, the membrane catches it before it hits the wood, preventing mold and rot. We also make sure to caulk around every window and door frame with a silicone sealant that’s rated for exterior use and can expand and contract with the steel. Cheap silicone will crack after a year, so we only use premium products. I’ve had clients come to us after a bad experience with another supplier, who used generic silicone around windows, and within 18 months, the caulk cracked, and water got into the wall cavity, leading to mold that required full interior demolition. We refuse to cut corners on these small, high-impact details.
Then there’s the floor, which is often overlooked, especially if you’re installing tile or laminate over it. Shipping container floors are made of wood planks (usually pine or fir) that sit on a steel subfloor. Those wood planks absorb water from condensation, ground moisture, or leaks, leading to rot and warping. Here’s how we waterproof our floors: first, we lift the original wooden planks (or leave them in place if the client wants to keep the vintage look) and apply a layer of vapor barrier plastic over the steel subfloor. The vapor barrier is 20-millimeter thick, which is thick enough to resist punctures and block all ground moisture. If we’re lifting the wood planks, we seal the back of each plank with a penetrating epoxy sealant, which soaks into the wood and prevents it from absorbing water. Then, we add a layer of plywood over the planks, sealing the seams between the plywood sheets with polyurethane adhesive and tape. If the client is installing hardwood or tile, we add another layer of waterproof underlayment before finishing. I once had a client in Houston skip this step, and within two years, their laminate floor had buckled in three spots from underfloor moisture— they spent $8,000 replacing the entire floor, which was more than the cost of adding the waterproofing during construction.
One of the most important steps that many people forget is waterproofing around penetrations. Every container home will have penetrations: pipes for plumbing, vents for the HVAC system, electrical lines, maybe even a skylight. Each of these penetrations is a potential leak point, because they cut through all the waterproof layers we just installed. For pipes, we use lead flashing— a flexible metal sheet that’s formed around the pipe, sealed with butyl rubber, and fastened to the roof or wall with stainless steel screws. Lead flashing is durable, doesn’t corrode, and creates a tight seal around the pipe. For vents, we use a pre-fabricated vent boot that’s made specifically for rubberized membrane roofs, and we seal the edges with silicone. For electrical lines, we use waterproof conduit and seal the gaps around the conduit with a foam sealant that’s rated for outdoor use. I always tell our team to treat every penetration like a potential leak, and when we do a final inspection, we crawl on the roof (safely, with harnesses) and run our hands along every pipe, vent, and seam to make sure there are no gaps.
Now, what about common mistakes we see customers making, and how to avoid them? First, using only spray-on sealant. As I mentioned earlier, spray sealant is a temporary fix— it’s not designed to hold up to years of UV exposure, freeze-thaw cycles, and flexing. We always use a multi-layer system: sealant for seams, membrane for large surfaces, and flashing for penetrations. Second, not accounting for drainage. Even the best waterproofing will fail if water can pool on the roof. We make sure the roof has a minimum 1/4 inch of slope per foot, so water runs off within 24 hours— any slower, and water will pool, leading to leaks. Third, ignoring the interior. Waterproofing isn’t just exterior work— we always add a moisture barrier on the interior walls, especially in bathrooms and kitchens, to catch any leaks that might get through the exterior. Fourth, skipping regular maintenance. Waterproofing isn’t a one-time job— every year, we recommend our clients do a quick inspection: check for cracked caulk around windows and doors, clear debris from the roof drains, and inspect the flashings around pipes and vents. I send all our clients a free maintenance checklist after delivery, and we offer annual maintenance services at a discounted rate, because we know that a 20-minute check can prevent a $10,000 repair.
At the end of the day, waterproofing a container house is about more than just preventing leaks— it’s about making sure your home is safe, comfortable, and valuable for years to come. A container house that’s properly waterproofed won’t have mold, won’t have rust, and won’t lose value due to water damage. I started my business because I saw too many people get scammed by suppliers who cut corners, and I wanted to offer a product that’s built to last, not just sell fast. If you’re planning to build a container house, don’t take the risk of cutting corners on waterproofing— it’s the most important investment you’ll make in your home.

If you’re ready to discuss your container house project, whether it’s a small 20ft home, a 40ft family home, or a multi-unit container complex, get in touch with our team to start planning your waterproofing and construction. We work with clients across all regions, from rainy Pacific Northwest to dry desert Southwest, and we tailor our waterproofing process to your local climate, so you can have peace of mind that your home is protected for years. We’re here to answer all your questions, walk you through our process, and help you build the container house you’ve been dreaming of, without the stress of leaks and repairs.
Standard Apple Cabin References
- Container Home Waterproofing Guide, National Association of Home Builders
- Steel Structure Durability: Water Resistance Considerations, American Institute of Steel Construction
- Residential Roofing Waterproofing Standards, International Code Council
- Closed-Cell Foam Insulation Performance, Department of Energy
- Maintenance Best Practices for Permanent Shipping Container Structures, Container Home Association
Aoborui Seiko Technology (Weifang) Co., Ltd.
As one of the most professional container house manufacturers and suppliers in China, we also support customized service. Please feel free to wholesale high-grade container house made in China here from our factory. Welcome to view our website for more information.
Address: Building 38, Zhongnan High-tech, Weifang Yuandu Huizhi Industrial Park, No. 3999, Taixiang Street, Hanting District, Weifang City, Shandong Province
E-mail: admin@sino-abr.com
WebSite: https://www.sinoabr.com/
